So, you’ve just gotten your hands on the 35-DS3CHIPDUS3—nice move. It’s one of those powerhouse chips with serious capability, loved for its versatility across platforms and razor-sharp performance. But here’s the deal: installing it the right way matters. Whether you’re setting it up for a gaming rig, a professional workstation, or something more industrial, nailing the installation process means fewer headaches and more smooth sailing down the line.
This guide? It’s not just a how-to. Think of it as your go-to buddy talking you through each step with a flashlight and a cup of coffee. We’ll start from prepping your system to fixing the most annoying bugs. Let’s get into it.
Know Before You Go: System Requirements
Before you even crack open your case, you need to make sure your system can handle the 35-DS3CHIPDUS3. Here’s your quick checklist:
Hardware You’ll Need:
- Processor: Intel Core i5 (9th Gen or up) or a comparable AMD chip
- RAM: Minimum 8 GB (but 16 GB makes things smoother)
- Storage: At least 256 GB SSD
- Power Supply: Certified 500W or higher
- Ports: PCIe x16, USB 3.0, optional HDMI
- Cooling: Decent airflow or dedicated cooling setup
Software Must-Haves:
- Operating System: Windows 10/11, macOS (Catalina or newer), or Linux Kernel 5.4+
- BIOS: UEFI with virtualization support
- Drivers: Official DS3 driver package only
- Firmware: Version 2.1 or newer is recommended
Getting Hands-On: Step-by-Step Installation

Step 1: Prep Like a Pro
- Shut everything down. Like, really shut it down—power off, unplug, and ground yourself.
- Grab a screwdriver, open up your case, and make sure you’re working in a static-free zone. Anti-static wrist strap? Use it.
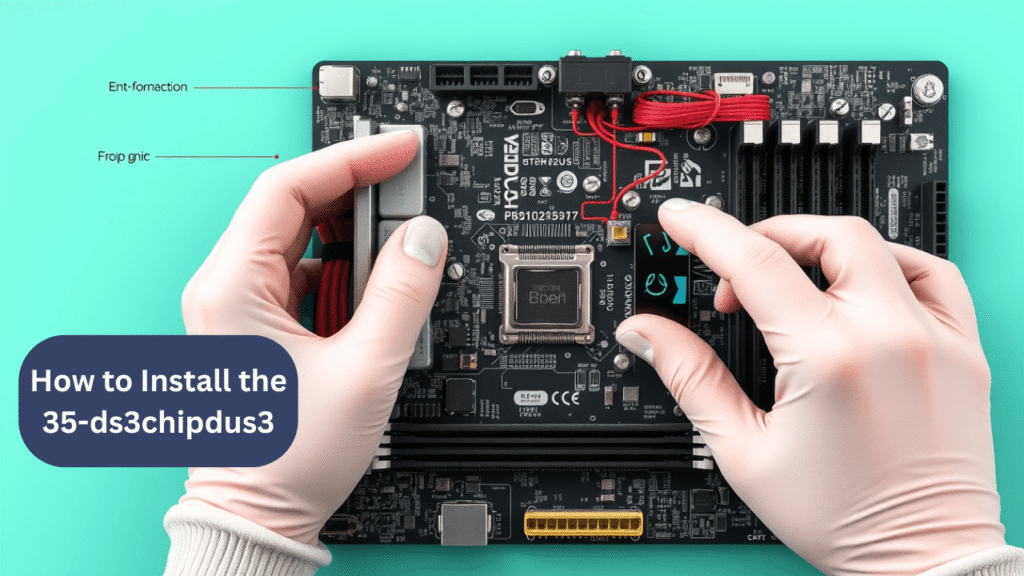
Step 2: Slot the Chip In
- Find that PCIe x16 slot—it’s usually the long one near the bottom half of the board.
- Line up the pins carefully and press the chip down until you hear or feel that reassuring click.
- Screw it in place so it doesn’t wiggle loose later on.
Step 3: Hook It Up
- Use the provided power connector from your PSU to juice the chip.
- If it connects via USB headers, find an open USB 3.0 header and plug it in.
- For diagnostics or display output, hook up the HDMI or serial cable.
Step 4: Boot and BIOS
- Hit the power button, and immediately press F2 or DEL to enter BIOS.
- Enable PCIe lanes and turn on virtualization features.
- Save and exit—your chip should now be detectable at a hardware level.
Step 5: Install Those Drivers
- Once in Windows/macOS/Linux, open Device Manager (or equivalent).
- The chip might show up as an unknown device—don’t panic.
- Install the official DS3 driver package:
- DS3 Controller Driver
- DS3 Interface Utility
- Diagnostic Tools
- Reboot your system.
Step 6: Verify Firmware
- Launch the DS3 utility software.
- Navigate to the System tab.
- If the firmware version is older than 2.1, run the update tool.
- Restart again to apply changes.
After Installation: Post-Setup Tweaks That Matter
Customize Performance Profiles
Open the DS3 software and choose a performance mode:
Also Read

- Balanced – Great for daily use
- High Power – If you want max performance (and don’t mind the heat)
- Silent Mode – Keeps things cool and quiet
Want to get nerdy? Dive into manual voltage and clock speed tuning.
Stability Testing
- Run the built-in diagnostic utility.
- Use stress-testing tools if you’re curious about how much heat or power the chip can handle under pressure.
- Watch for temperature spikes or error logs.
Set Auto-Start
- Head to the DS3 interface settings.
- Enable the “Launch on Startup” option so your chip gets working right out of the gate.
OS-Specific Tweaks & Tips
For Windows Users:
- Set your power plan to “High Performance” via Control Panel.
- Block Windows Update from messing with your custom drivers—yes, it happens.
For macOS Users:
- Use Terminal to allow third-party kernel extensions.
- You might need to reboot into recovery mode and disable Gatekeeper (temporarily) to get DS3 tools working.
For Linux Users:
- Load the DS3 module at startup—
modprobe ds3chipis your friend. - Add it to your system’s boot config.
- Set up a systemd service if you want it to auto-load on boot.
Why You’ll Love the 35-DS3CHIPDUS3
Here’s why tech geeks are hyped about this chip:
- Energy Efficient – Powerful, yet cool and quiet
- Cross-Platform Friendly – Works across major OS platforms
- Built with Security in Mind – Encrypted firmware, secure boot
- Modular & Flexible – Plays well with other hardware
- Smart Power Saving – Switches to low-power mode when idle
Troubleshooting: Real Problems, Real Fixes
Problem 1: Not Showing Up in BIOS
Fix:
- Check if the chip is seated properly.
- Try resetting CMOS and re-enable virtualization features.
Problem 2: Driver Refuses to Install
Fix:
- Update your OS first.
- Boot into Safe Mode and manually point the installer to your driver files.
Problem 3: Chip Is Overheating
Fix:
- Add more fans or clean existing ones.
- Consider upgrading your heat sink or thermal pads.
Problem 4: Firmware Update Fails
Fix:
- Close unnecessary background apps.
- Run the update tool as Administrator.
- If all else fails, check the manual for how to do a soft reset using the jumper method.
Problem 5: HDMI Output Isn’t Working
Fix:
- Make sure the HDMI cable is actually compatible.
- Open DS3 software and confirm that video output is enabled.
Maintenance 101: Keep It Running Smooth
- Clean the chip and PCIe slot every six months—yes, dust matters.
- After big OS updates, re-run diagnostics to ensure everything’s working right.
- Don’t rush firmware updates. Wait for stable versions.
- Always back up your system before making big changes.
Conclusion: You’ve Got This
Installing the 35-DS3CHIPDUS3 might sound technical—and it is—but it’s totally doable. You just need to take it one step at a time. From the initial prep to final tweaks, every stage plays a role in getting the best out of this little beast of a chip.
Keep your drivers fresh, your BIOS smart, and your firmware updated—but don’t obsess. Most issues have simple fixes, especially once you’ve gone through this guide. Whether you’re using it for creative workloads, data crunching, or hardcore gaming, once this chip is dialed in, it’s a rock-solid performer.
FAQs
Q1: How can I check if my system supports 35-DS3CHIPDUS3?
A: Look for an open PCIe x16 slot, a decent power supply (500W+), 8 GB RAM, and OS support for Windows/macOS/Linux.
Q2: The chip isn’t detected—what now?
A: Reseat it, enable virtualization in BIOS, and check Device Manager or Linux logs.
Q3: Can I install it without internet access?
A: Sure—but download all necessary drivers and firmware first.
Q4: Is overclocking this chip safe?
A: Yes, with good cooling and some know-how. Don’t do it unless you understand the risks.
Q5: How long does the whole process take?
A: Physical install is under 10 minutes. Full setup (drivers, firmware, BIOS tweaks) takes around 30–45 minutes.
Stay ahead of the internet buzz with BackStageViral.com, your ultimate hub for viral stories and breaking trends.